一、安装PVE系统
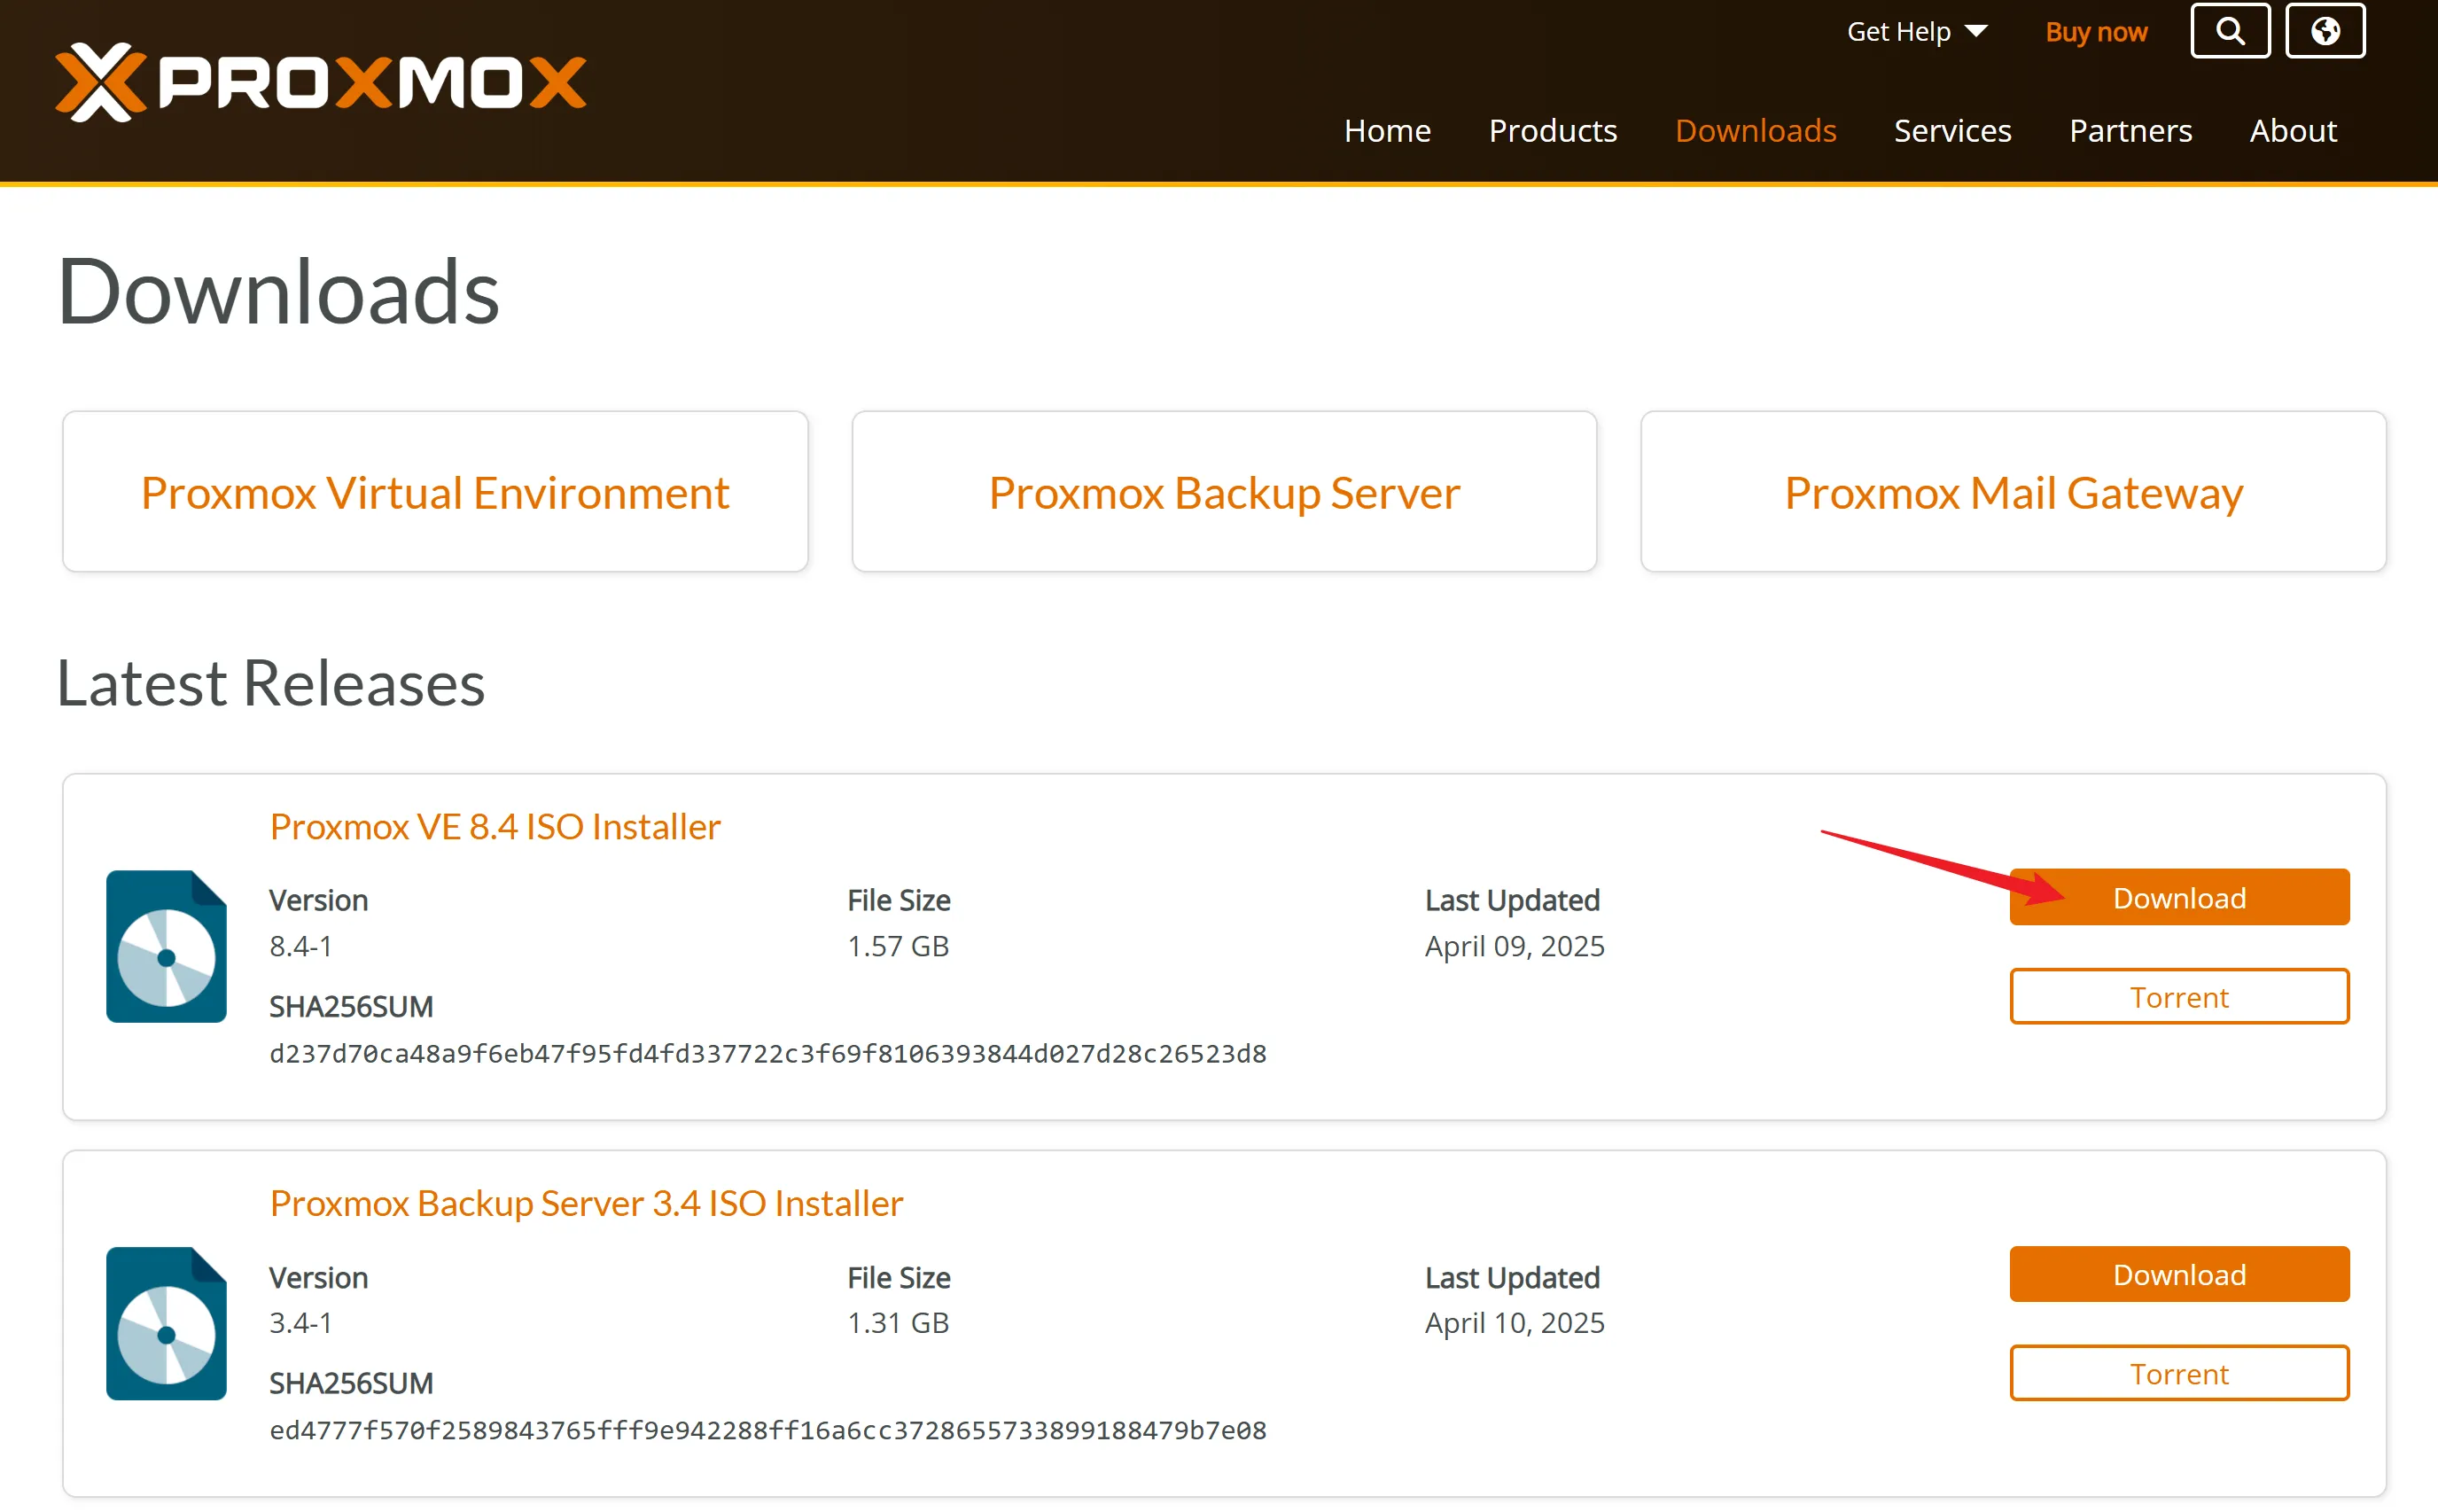
1、下载镜像
本次演示下载8.4.1镜像进行安装
2、安装系统
-
安装主机接入显示器、键盘、鼠标、刚制作的 U 盘插入蓝色 USB 口
-
设置 BIOS(开启 bios 里的虚拟化支持(Intel CPU 常见名称:
Intel VT,Intel Virtualization Technology,VT-x,AMD CPU 常见名称:SVM Mode,AMD-V,Secure Virtual Machine),如需要显卡直通操作同时开启(VT-d,SR-IOV,Above 4GB(如有可以开)) 因 BIOS 众多无法统一描述,请根据自己主机型号详细搜索相应修改教程),已经设置过则忽略此步 -
按电源开机,同时不停点按启动热键(自行查询自己主机的快捷热键比如 F 12)
-
选择制作的 U 盘, 即可进入启动 U 盘的界面
-
进入 PVE 安装界面,默认回车,然后选择右下角 I Agree

-
然后选择需要安装 PVE 的硬盘,单击 Options
-
选择国家时区,输入 china 即可
-
设置登录密码和邮箱,邮箱无所谓随便填
-
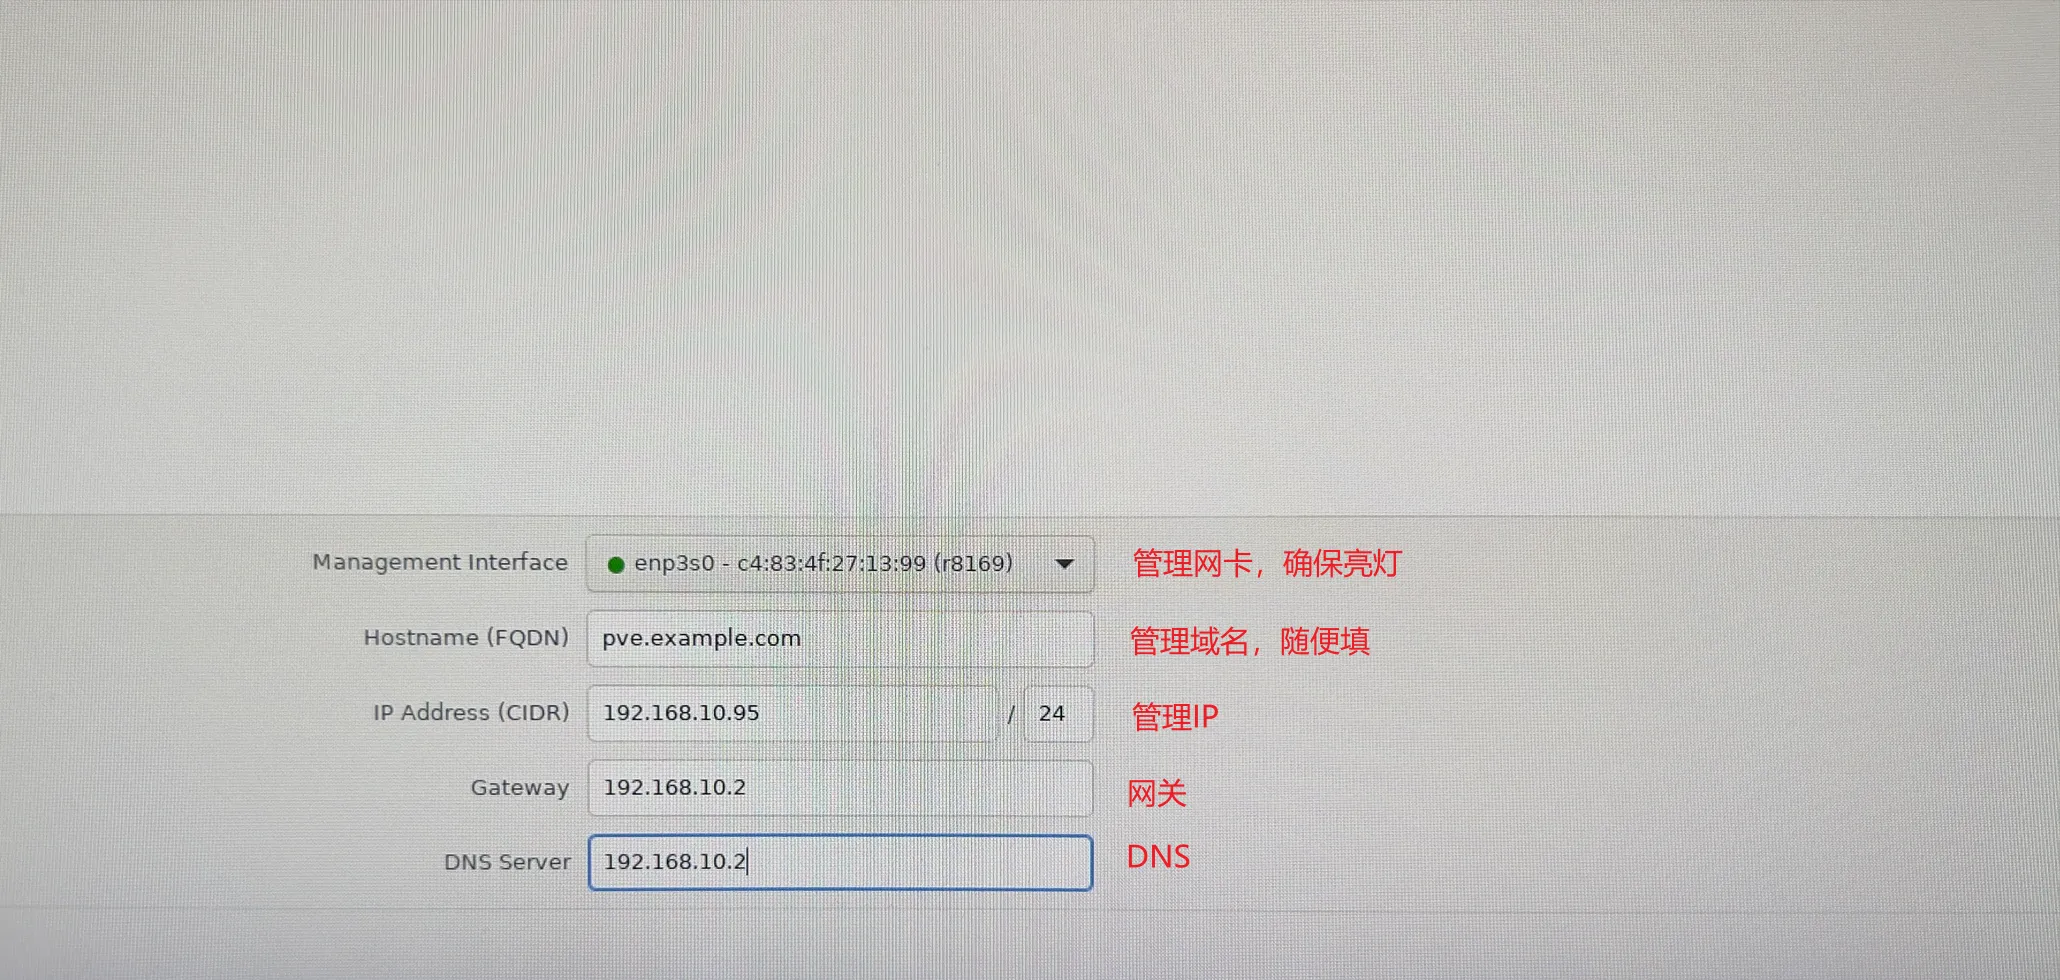
设置网络信息,网卡选择的管理网卡,保证绿灯亮起,网关、DNS 可以指向科学网关
-
然后点下一步,等待即可安装成功,自动重启后拔下 U 盘即可。
-
重启后会显示登录信息界面,此时可以拔下显示器鼠标键盘,去电脑登录操作了。

-
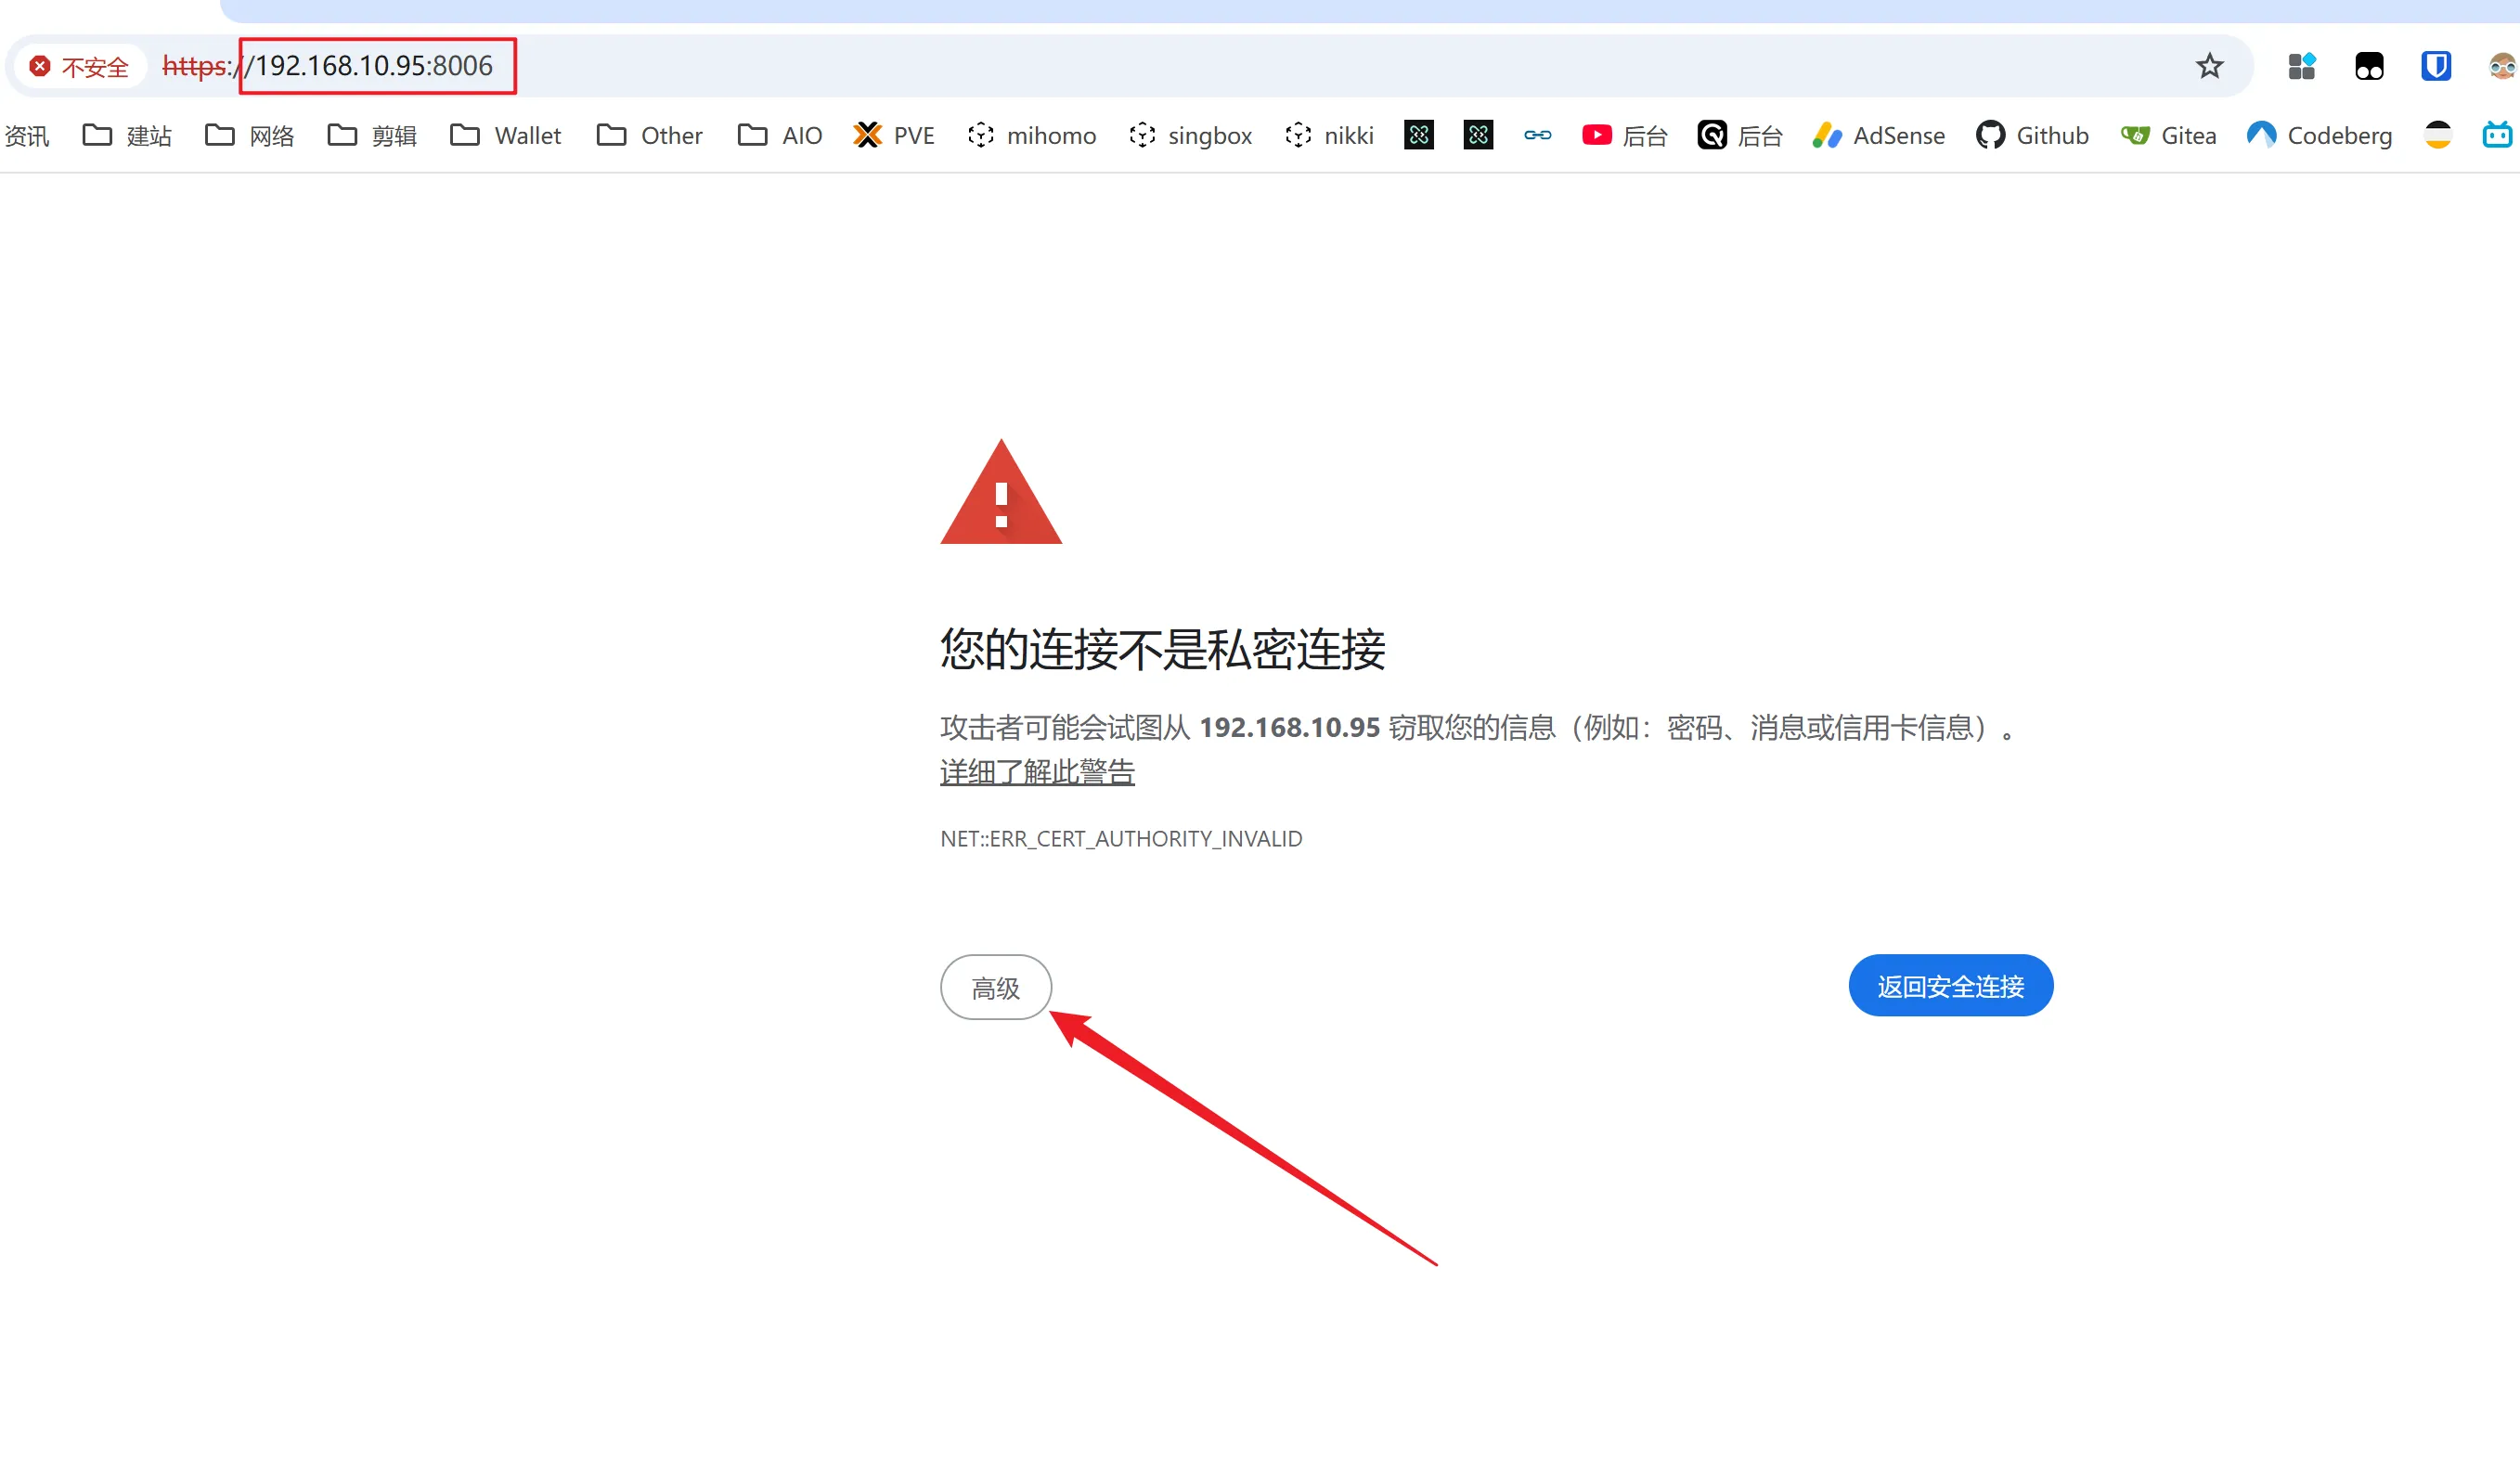
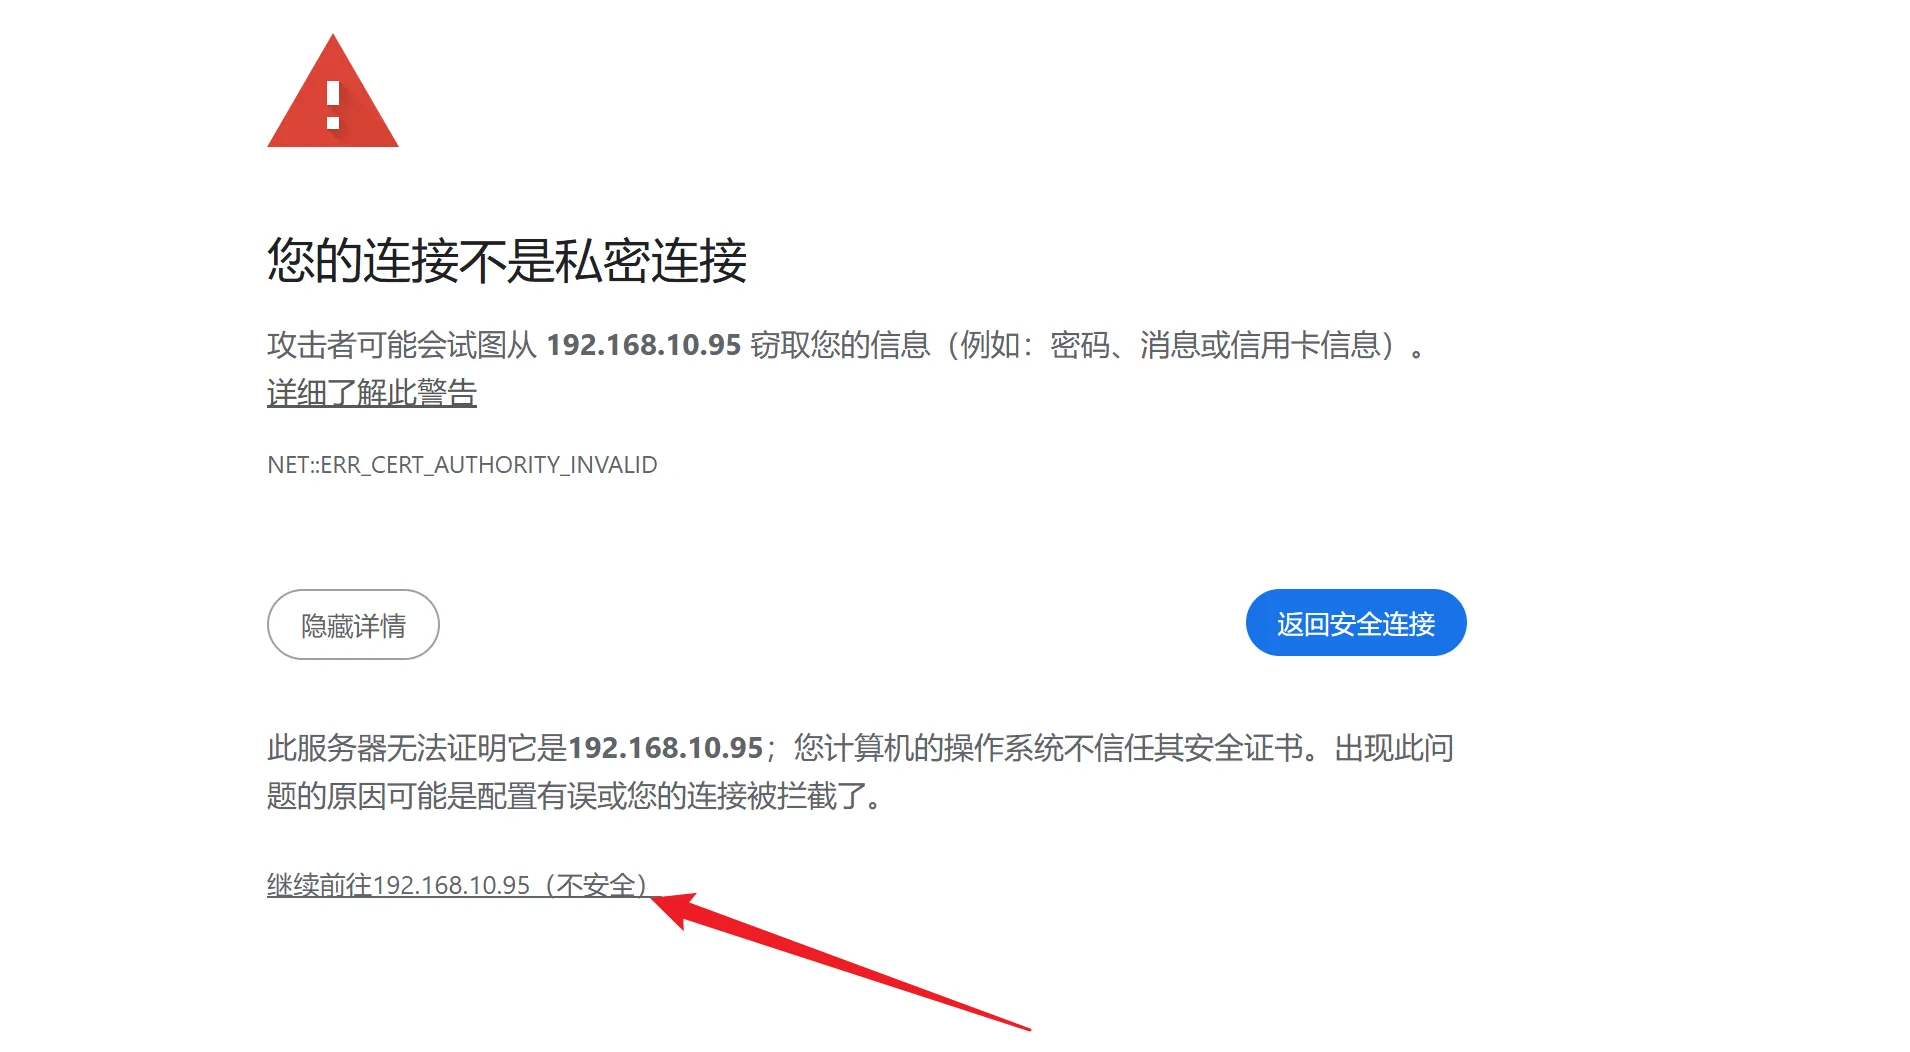
然后浏览器登录管理地址即可,别忘记加端口 8006, 登录用户名 root,密码为安装过程中设置的。
-
如果无法打开链接,请检查电脑是否和 pve 处于同一网段,只保留管理网线其他网线拔出,还不行, PVE 管理网线直接插在电脑上登录。
二、优化PVE系统
1、去除 PVE 的登录弹窗
Proxmox VE 6.3 / 6.4 / 7.0 / 7.1 / 7.2 / 7.3 / 7.4 / 8.0 / 8.1 / 8.2 去掉未订阅的提示
注意:去除订阅弹窗提醒以后,必须清除浏览器的缓存数据(清理浏览器缓存)后生效
sed -i_orig "s/data.status === 'Active'/true/g" /usr/share/pve-manager/js/pvemanagerlib.js
sed -i_orig "s/if (res === null || res === undefined || \!res || res/if(/g" /usr/share/javascript/proxmox-widget-toolkit/proxmoxlib.js
sed -i_orig "s/.data.status.toLowerCase() !== 'active'/false/g" /usr/share/javascript/proxmox-widget-toolkit/proxmoxlib.js
systemctl restart pveproxy
2、软件源设置(debian 源、PVE 源、企业源、ceph 源)
curl https://zk.ziiix.cn/script/pve/pve_yuan.sh |bash
更新PVE软件
apt update
apt dist-upgrade
3、添加CPU、硬盘等详细信息显示
curl https://zk.ziiix.cn/script/pve/showtempcpufreq.sh | bash
4、切换CPU模式
apt install linux-cpupower powertop -y
-
执行以下命令开启高性能或者省电模式
-
全核高性能
cpupower frequency-set -g performance
-
全核省电模式
cpupower frequency-set -g powersave
5、给PVE的扩容(可选项)
移除local-lvm可能会影响PVE的部分快照功能。
在Shell里面输入
lvremove pve/data
# 输入Y
lvextend -l +100%FREE -r pve/root
再点击数据中心 – 存储 – local-lvm – 移除,再双击local,把内容里的所有选项都选中。
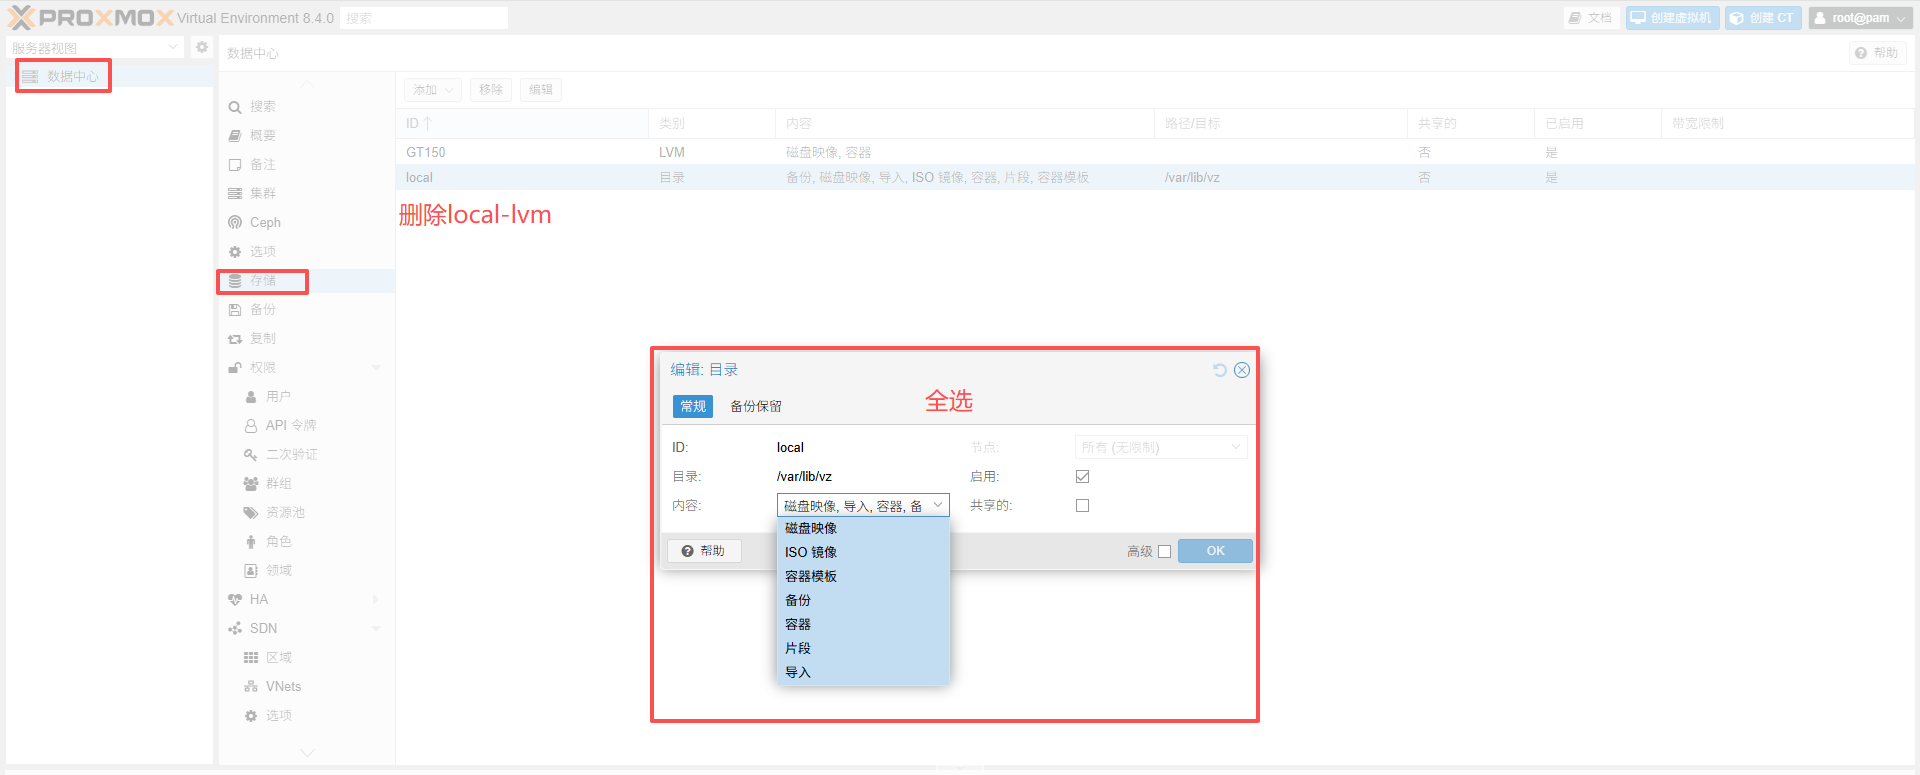
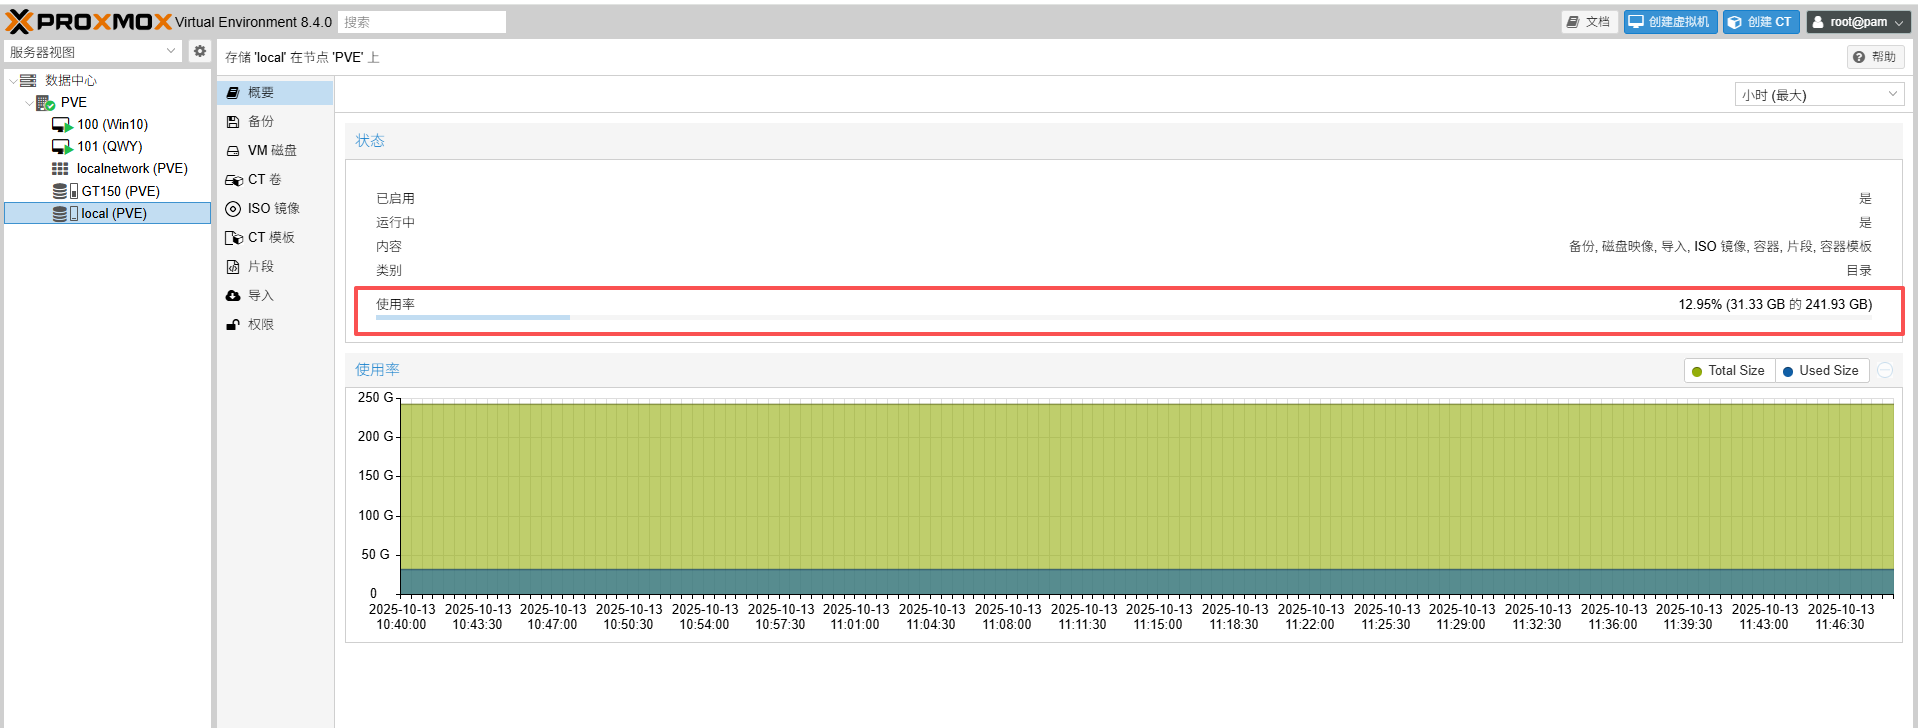
磁盘容量已经整合到local中
6、直通 PCIe 设备
目前的 PVE 8.4.1 版本,默认开启了 PCIE 直通。
检验 PCIE 直通结果
Shell 窗口输入 lspci ,回显如下(里面包含你所有的 PCIe 设备列表):
root@PVE:~# lspci
00:00.0 Host bridge: Intel Corporation Alder Lake-U15 Host and DRAM Controller (rev 04)
00:02.0 VGA compatible controller: Intel Corporation Alder Lake-UP3 GT1 [UHD Graphics] (rev 0c)
00:06.0 PCI bridge: Intel Corporation 12th Gen Core Processor PCI Express x4 Controller #0 (rev 04)
00:06.2 PCI bridge: Intel Corporation 12th Gen Core Processor PCI Express x4 Controller #2 (rev 04)
00:0d.0 USB controller: Intel Corporation Alder Lake-P Thunderbolt 4 USB Controller (rev 04)
00:14.0 USB controller: Intel Corporation Alder Lake PCH USB 3.2 xHCI Host Controller (rev 01)
00:14.2 RAM memory: Intel Corporation Alder Lake PCH Shared SRAM (rev 01)
00:14.3 Network controller: Intel Corporation Alder Lake-P PCH CNVi WiFi (rev 01)
00:16.0 Communication controller: Intel Corporation Alder Lake PCH HECI Controller (rev 01)
00:17.0 SATA controller: Intel Corporation Alder Lake-P SATA AHCI Controller (rev 01)
00:1c.0 PCI bridge: Intel Corporation Alder Lake PCI Express x4 Root Port (rev 01)
00:1c.5 PCI bridge: Intel Corporation Alder Lake-P PCH PCIe Root Port (rev 01)
00:1f.0 ISA bridge: Intel Corporation Alder Lake PCH eSPI Controller (rev 01)
00:1f.3 Audio device: Intel Corporation Alder Lake PCH-P High Definition Audio Controller (rev 01)
00:1f.4 SMBus: Intel Corporation Alder Lake PCH-P SMBus Host Controller (rev 01)
00:1f.5 Serial bus controller: Intel Corporation Alder Lake-P PCH SPI Controller (rev 01)
01:00.0 Non-Volatile memory controller: MAXIO Technology (Hangzhou) Ltd. NVMe SSD Controller MAP1202 (rev 01)
02:00.0 Non-Volatile memory controller: MAXIO Technology (Hangzhou) Ltd. NVMe SSD Controller MAP1608 (DRAM-less) (rev 01)
03:00.0 Ethernet controller: Realtek Semiconductor Co., Ltd. RTL8111/8168/8411 PCI Express Gigabit Ethernet Controller (rev 15)
04:00.0 Ethernet controller: Realtek Semiconductor Co., Ltd. RTL8111/8168/8411 PCI Express Gigabit Ethernet Controller (rev 15)
7、开启核显SR-IOV(若需要)
执行下面脚本
apt install build-* dkms git sysfsutils -y
apt install proxmox-headers-$(uname -r) proxmox-kernel-$(uname -r)
克隆代码
cd ~
git clone https://gitee.com/ifwwww/i915-sriov-dkms
安装sriov模块,请逐条运行:
cd ~/i915-sriov-dkms
dkms add .
这里记录出现的i915-sriov-dkms版本号,比如版本号为“2025.07.22”(该版本号会变,请以你的实际版本为准)
将下面这行代码中的汉字替换为你的版本号再运行代码:
dkms install -m i915-sriov-dkms -v 把这里换成版本号 --force
## 比如
dkms install -m i915-sriov-dkms -v 2025.07.22 --force
编辑 grub 配置文件
apt install vim -y

vim /etc/default/grub
GRUB_CMDLINE_LINUX_DEFAULT="quiet i915.enable_guc=3 i915.max_vfs=2"
在 quiet 后添加i915.enable_guc=3 i915.max_vfs=2的“2”表示可以添加2个虚拟核显(最多7个)添加越多性能越弱,我这里只加2个就够用

更新grub和initramfs
update-grub
update-initramfs -u
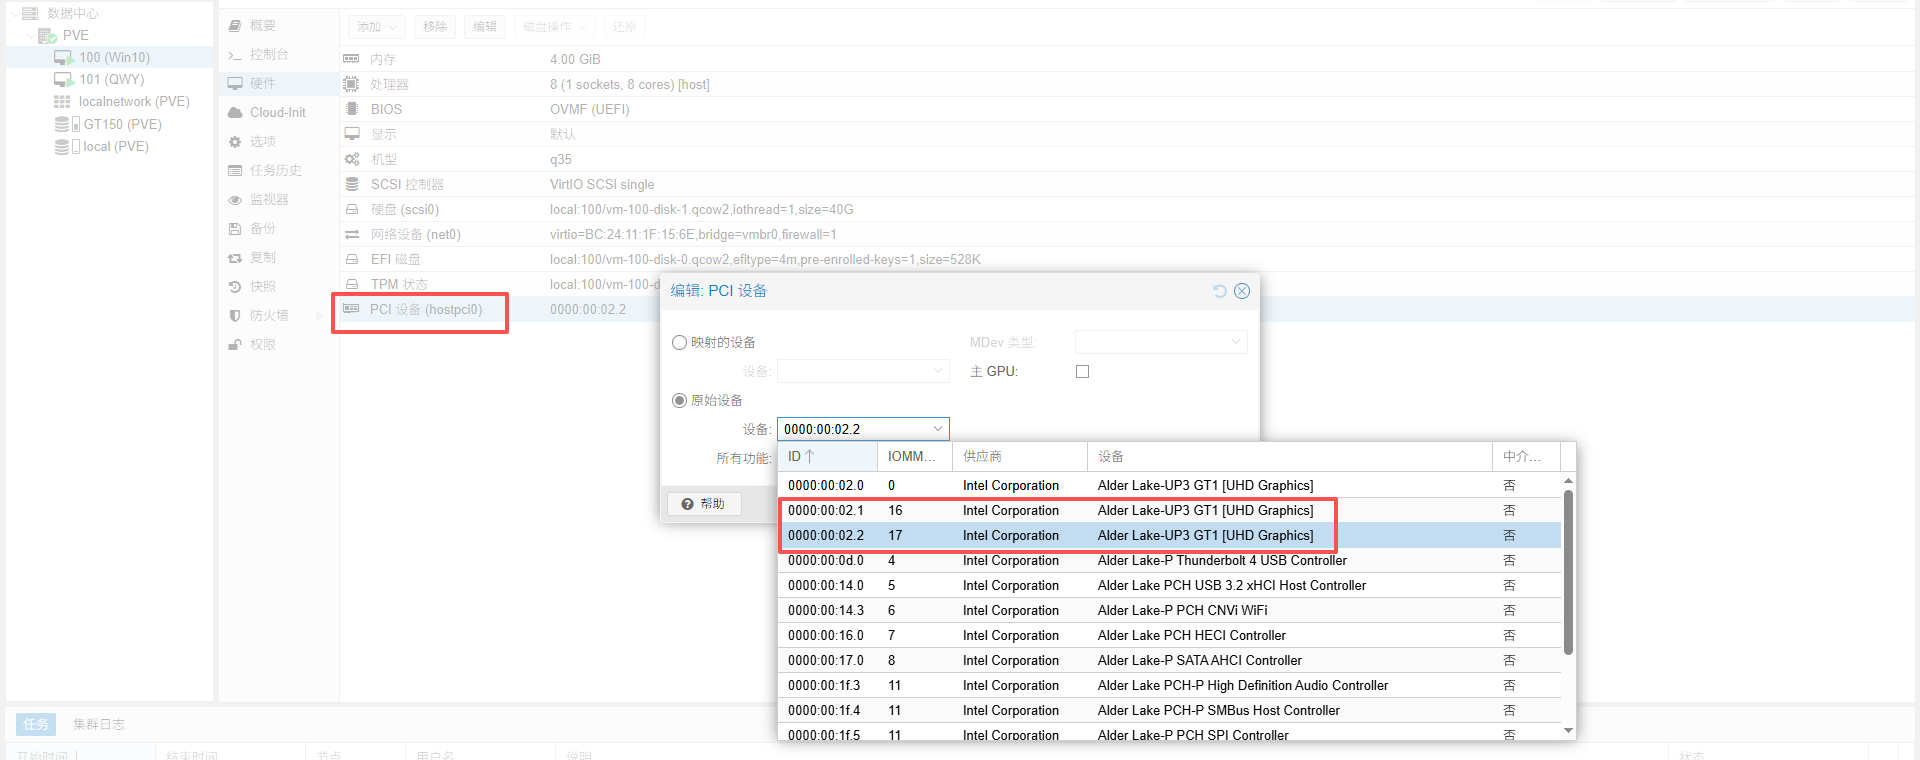
查看当前核显ID,并记录:
root@PVE:~# lspci | grep VGA
00:02.0 VGA compatible controller: Intel Corporation Alder Lake-UP3 GT1 [UHD Graphics] (rev 0c)
将上面记录的核显ID替换下面代码中的0000:00:02.0(有可能没有显示0000:,下面的代码中补全即可),sriov_numvfs = 2 中的 2 是需要虚拟的核显数量,不能大于7(前边设置的2),添加数量越多同时使用时核显性能越弱,大家按需选择,我这里设置为2:
echo "devices/pci0000:00/0000:00:02.0/sriov_numvfs = 2" > /etc/sysfs.conf
reboot
重启在PVE的Shell中输入以下命令查看SR-IOV核显直通是否成功:
root@PVE:~# lspci | grep VGA
00:02.0 VGA compatible controller: Intel Corporation Alder Lake-UP3 GT1 [UHD Graphics] (rev 0c)
00:02.1 VGA compatible controller: Intel Corporation Alder Lake-UP3 GT1 [UHD Graphics] (rev 0c)
00:02.2 VGA compatible controller: Intel Corporation Alder Lake-UP3 GT1 [UHD Graphics] (rev 0c)
这里的 00:02.0 VGA 第一个是不可以用的,用 00:02.1 和 00:02.2 才是我们虚拟化出来的
三、创建虚拟机
1、创建windos虚拟机直通核显
参考文档:https://v2rayssr.com/pve-install.html
-
下载 Windows11 安装包: (下载 Windows 11 磁盘镜像 ISO 文件)
-
来到网络界面,按键盘上面的
Shift键 + F10键,调出 CMD 窗口,单击窗口输入oobe\bypassnro并回车 -
现在安装程序会重启,并再次来到 连接网络界面,选择
我没有 Internet 连接来跳过此操作,继续点击 继续执行受限设置 -
先创建win虚拟机完成初始化后关机添加pci设备 选择虚拟化出来的核显
windos virtIO驱动ISO:
系统为安装自动安装核显驱动则手动下载安装安装完成后在任务管理器中就可以看到GPU设备
英特尔® Arc™ 和锐炬® Xe 显卡 (intel.cn) https://www.intel.cn/content/www/cn/zh/download/785597/intel-arc-iris-xe-graphics-windows.html
评论(0)